
The software used for 3D exterior house rendering typically combines a CAD or modeling application (SketchUp, Revit, or 3ds Max) with a dedicated rendering engine (V-Ray, Corona, or Lumion) and a post-production suite like Photoshop. Professional studios rarely rely on a single tool; instead, they build a modeling-to-render pipeline where each application handles a specific stage, from massing and geometry to photometric lighting, material simulation, and final color grading. This layered approach is why renderings from established studios look convincingly real, while single-app outputs from generic tools often look flat or artificial.
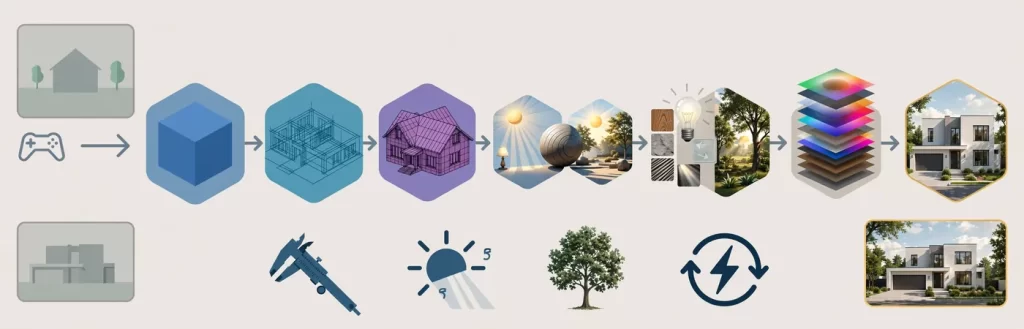
If you’ve ever wondered why one exterior rendering looks like a photograph and another looks like a video game cutscene, the answer almost always comes down to the software used for 3D exterior house rendering company teams and the workflow built around it. Studios that consistently deliver photorealistic exterior rendering services invest in a specific stack of applications, each chosen for a reason: geometry accuracy, physically based lighting, vegetation realism, or fast iteration speed. This guide breaks down exactly what that stack looks like, section by section, so you understand what you’re paying for when you hire a rendering partner.
Why the Right Software Stack Matters for Exterior Renderings
Homeowners, architects, and builders often assume that photorealism is purely a matter of artistic skill. Skill matters enormously, but it can only go as far as the underlying technology allows. The software used for 3D exterior house rendering determines how light behaves, how materials reflect, and how much fine detail a scene can hold before render times become unreasonable.
Consequently, studios that specialize in exterior visualization don’t pick one program and call it done.
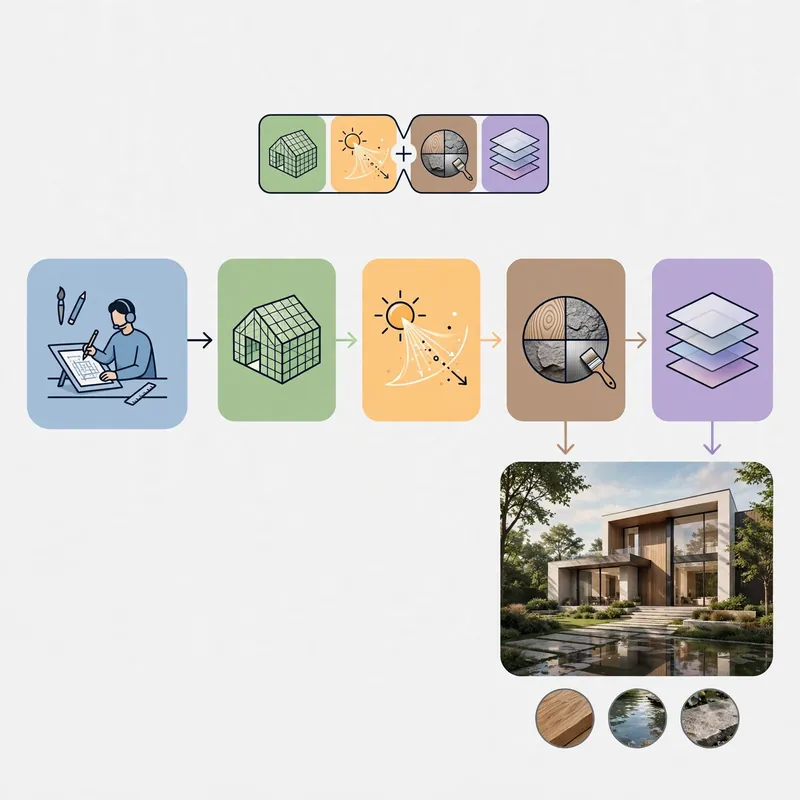

They combine multiple applications because:
- No single tool excels at modeling, lighting, texturing, and compositing simultaneously.
- Different project types (a single-family home versus a large residential development) demand different levels of detail and automation.
- Client deadlines require a pipeline that balances render quality against turnaround time.
Because of this, understanding the toolchain helps you ask better questions when evaluating a 3D exterior house rendering company, and it also explains why pricing varies so much between vendors using different technology.
The Three-Stage Pipeline Professional Studios Follow
Before diving into individual applications, it helps to understand the general structure most studios follow. Regardless of which specific tools they choose, professional workflows almost always break into three connected stages.
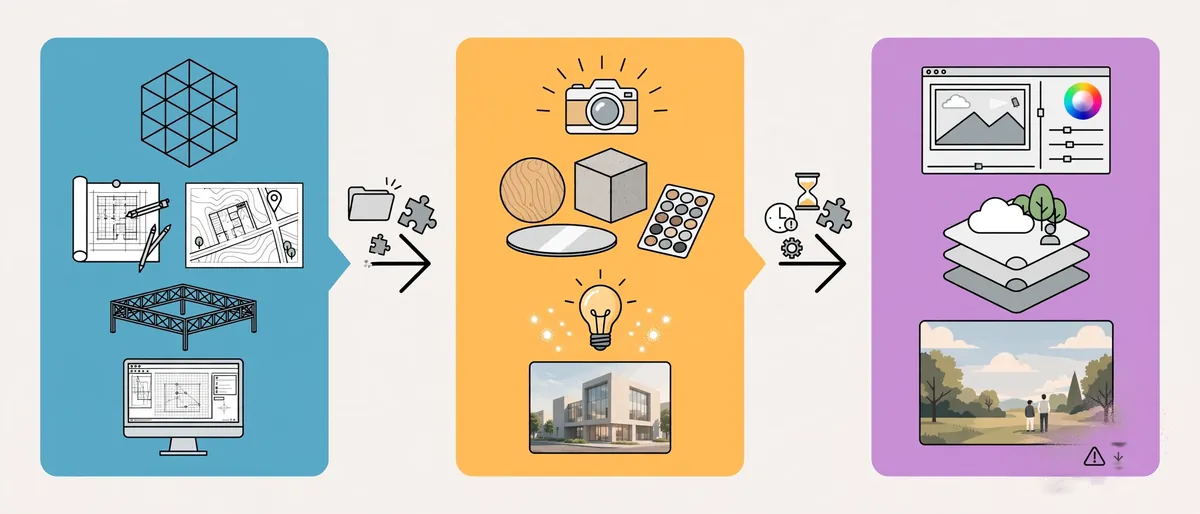
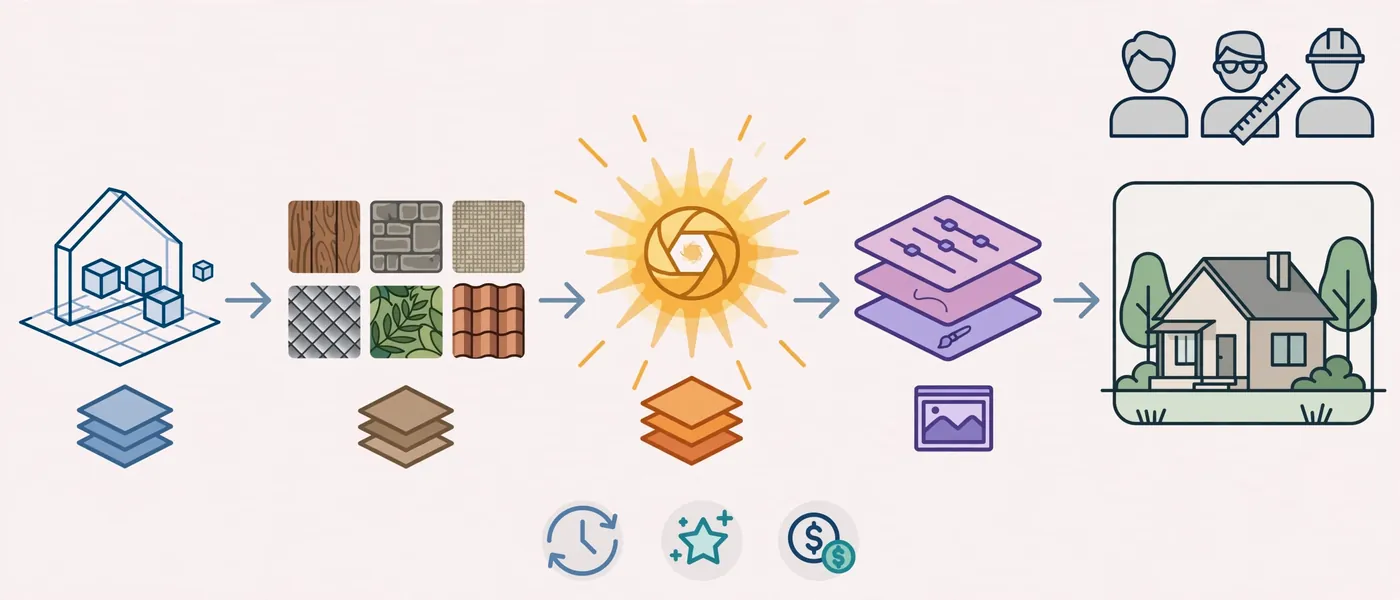
Stage 1: Modeling and Massing
The building’s geometry, site layout, and structural elements are constructed first, typically from architectural drawings or CAD files.
Stage 2: Rendering and Lighting
A rendering engine calculates how light interacts with every surface, material, and object in the scene, producing the raw image.
Stage 3: Post-Production
The rendered image is refined in editing software to correct color, add atmosphere, and blend any composited elements like sky replacements or people.
Each stage relies on distinct software, and the transitions between them are where studio expertise really shows. Poor file management or incompatible plugins between stages is a common source of delays and quality loss, which we’ll cover later in the common mistakes section.
Modeling Software: Building the Digital Foundation
Every exterior rendering starts as a 3D model, and the accuracy of that model directly affects how believable the final image looks. Below are the modeling applications professional studios rely on most.
SketchUp
SketchUp remains a favorite for residential exterior projects because of its intuitive interface and massive library of pre-built components (furniture, plants, fixtures). Studios often use it for early massing studies before layering in detailed materials and lighting through a plugin-based render engine.
Autodesk Revit
For projects that originate from architectural BIM (Building Information Modeling) workflows, Revit is the standard. It keeps structural, mechanical, and design data connected, which matters when a home design changes mid-project and everything downstream needs to update automatically.
3ds Max
Autodesk 3ds Max is the workhorse for high-end visualization studios producing marketing-grade exterior renderings. Its polygon modeling tools, camera controls, and deep integration with rendering engines like V-Ray and Corona make it a favorite for large residential and commercial exteriors.
Rhino (Rhinoceros 3D)
Rhino is popular for complex or curved architectural geometry, custom facades, and unusual roof structures where standard box-modeling tools fall short.
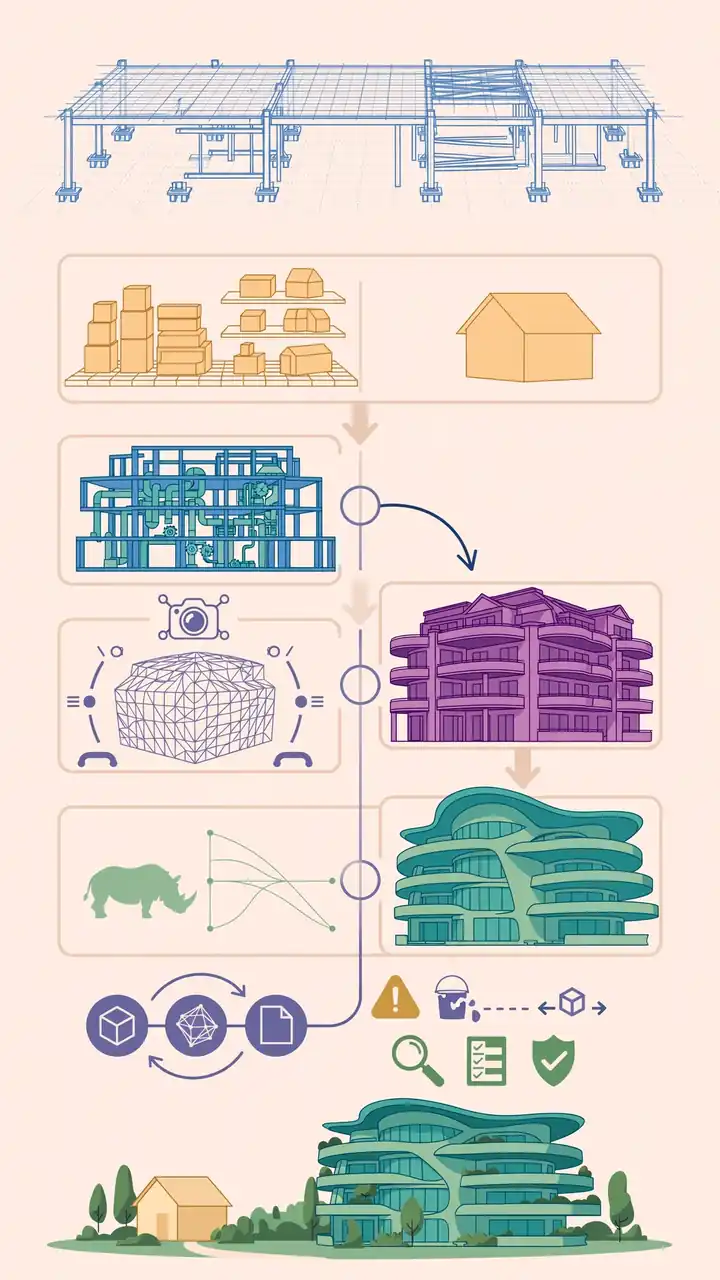
Studios frequently move a project between two of these tools, for instance, building the base geometry in Revit, then exporting to 3ds Max for detailed material work and camera framing. This handoff is a core part of why the software used for 3D exterior house rendering matters so much for the final quality.
Why Studios Rarely Stick to One Modeling Tool
A single-family home built in SketchUp may need only basic massing, while a multi-unit residential development with complex rooflines and curved balconies might require Rhino’s NURBS-based precision. Because client projects vary so widely in complexity, studios build internal standards for which tool handles which job type rather than forcing every project through the same pipeline. This flexibility is also why turnaround times differ so much between vendors: a studio comfortable moving files between Revit, 3ds Max, and Rhino can take on a wider range of architectural styles without slowing down.
Additionally, file interoperability plays a major role here. Formats like FBX, OBJ, and DWG allow geometry to move between applications, but each conversion carries a risk of losing material assignments, smoothing groups, or scale data. Experienced studios build quality-control checkpoints after every file transfer specifically to catch these issues before they reach the rendering stage, where they become far more expensive to fix.
Rendering Engines: Where Photorealism Actually Happens
If modeling software builds the “set,” the rendering engine is the “camera and lighting crew.” This is where physically accurate light bounces, reflections, shadows, and material properties are calculated, and it’s the single biggest factor separating amateur output from professional exterior renderings.
V-Ray
V-Ray, developed by Chaos, is arguably the most widely used rendering engine in architectural visualization. It supports both CPU and GPU rendering, offers precise control over materials and lighting, and integrates with SketchUp, 3ds Max, Revit, and Rhino. Studios favor it for its balance of photorealistic accuracy and render-time efficiency on large scenes.

Corona Renderer
Also owned by Chaos, Corona is known for producing extremely natural-looking results with minimal manual tweaking. Many artists describe it as more “intuitive” than V-Ray for lighting setups, which makes it a strong choice for studios optimizing for speed without sacrificing quality.
Lumion
Lumion is a real-time rendering engine popular for exterior architectural visualization because it renders scenes almost instantly, including landscaping, water, and atmospheric effects. It’s frequently used for quick client previews or when a project needs multiple angle variations delivered fast.
Enscape
Enscape is another real-time engine, tightly integrated with Revit and SketchUp, and commonly used during the design phase for walkthroughs and quick iteration rather than final marketing-grade stills.
Twinmotion
Built on Unreal Engine technology, Twinmotion offers real-time rendering with strong vegetation and environmental presets, making it useful for large residential developments with extensive landscaping.
Each engine has trade-offs. Real-time engines like Lumion and Twinmotion sacrifice a small degree of physical accuracy for dramatically faster turnaround, while ray-tracing engines like V-Ray and Corona take longer per frame but deliver the pixel-level realism seen in premium marketing renderings.
How Studios Decide Which Engine to Use
The choice between a real-time and a ray-traced engine usually comes down to the deliverable’s purpose rather than personal preference. For instance:
- Client design reviews during the concept phase often use Enscape or Lumion because stakeholders need to see multiple design iterations quickly without waiting hours per render.
- Final marketing stills for listing pages, brochures, or investor presentations almost always go through V-Ray or Corona, since these images are scrutinized at full resolution and need to withstand close inspection.
- Animated flythroughs frequently rely on Twinmotion or Lumion because rendering hundreds of individual frames through a ray-traced engine would be prohibitively time-consuming for most project budgets.
Many established studios, in fact, use two engines side by side within a single project: a real-time engine for client approval rounds, followed by a full ray-traced re-render of the approved composition for final delivery. This hybrid approach balances client responsiveness with the photorealistic quality that ray tracing provides.
Texturing and Material Libraries
Materials are what sell realism at close range. Even a perfectly modeled house looks unconvincing if the brick, stucco, or roofing material doesn’t reflect light correctly. Studios typically pull from a combination of:
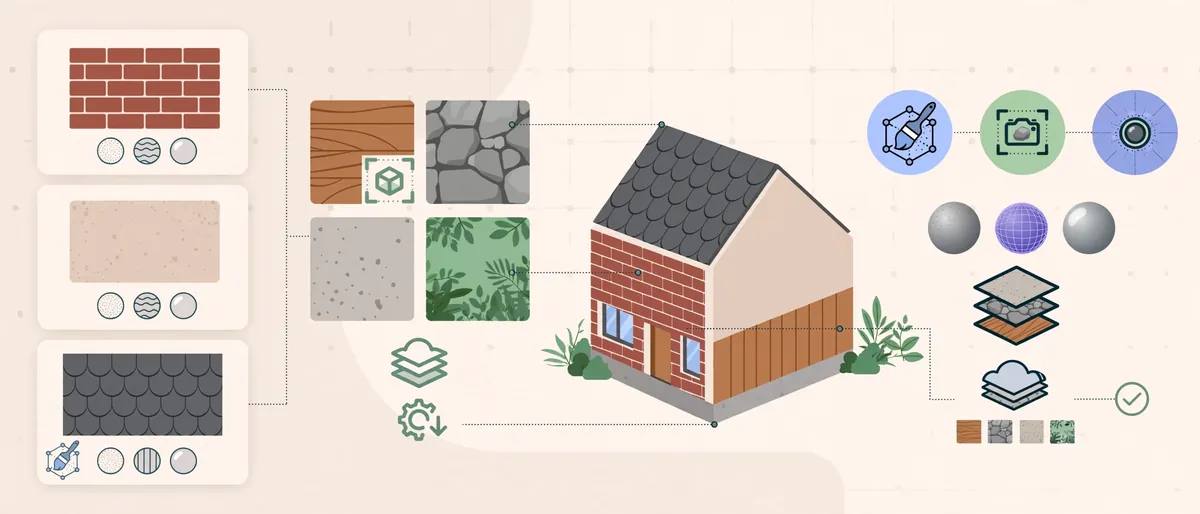
- Substance 3D Painter/Designer (Adobe): for creating and customizing procedural materials with fine control over roughness, bump, and reflectivity.
- Quixel Megascans: a scanned-material library offering photogrammetry-based textures for wood, stone, concrete, and vegetation.
- Chaos Cosmos: a native asset and material library built directly into V-Ray workflows.
Professional exterior renderings depend heavily on accurate material mapping, particularly for how texture-mapping decisions affect the believability of siding, roofing, and hardscape elements. This is covered in more depth in our guide on texture mapping in exterior rendering, which explains how UV mapping and material scaling prevent the stretched or repetitive look common in lower-quality renderings.
Vegetation, Environment, and Context Tools
A house doesn’t exist in isolation, and the surrounding landscape often makes or breaks an exterior rendering’s believability. Studios use specialized tools to populate scenes with realistic context.
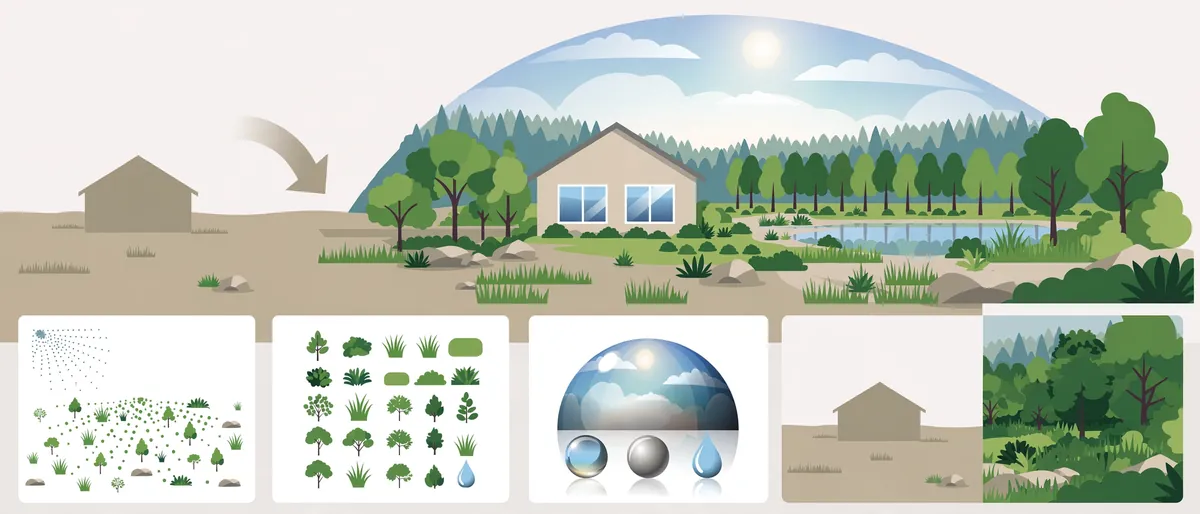
- Forest Pack (iToo Software): a scattering plugin for 3ds Max that distributes trees, grass, and rocks naturally across large areas without manually placing each object.
- Laubwerk / Quixel vegetation assets: pre-built, high-detail plant models used to populate gardens, lawns, and tree lines.
- HDRI environment maps: high-dynamic-range panoramic images used to simulate realistic outdoor lighting and reflections, particularly for glass, water features, and metal surfaces.
Getting vegetation and site context right is one of the technical differentiators separating premium studios from budget providers, a topic explored further in our breakdown of what makes a photorealistic exterior house rendering.
Post-Production Software for Final Polish
Once the raw render is generated, it moves into post-production, where studios refine color, contrast, and atmosphere.
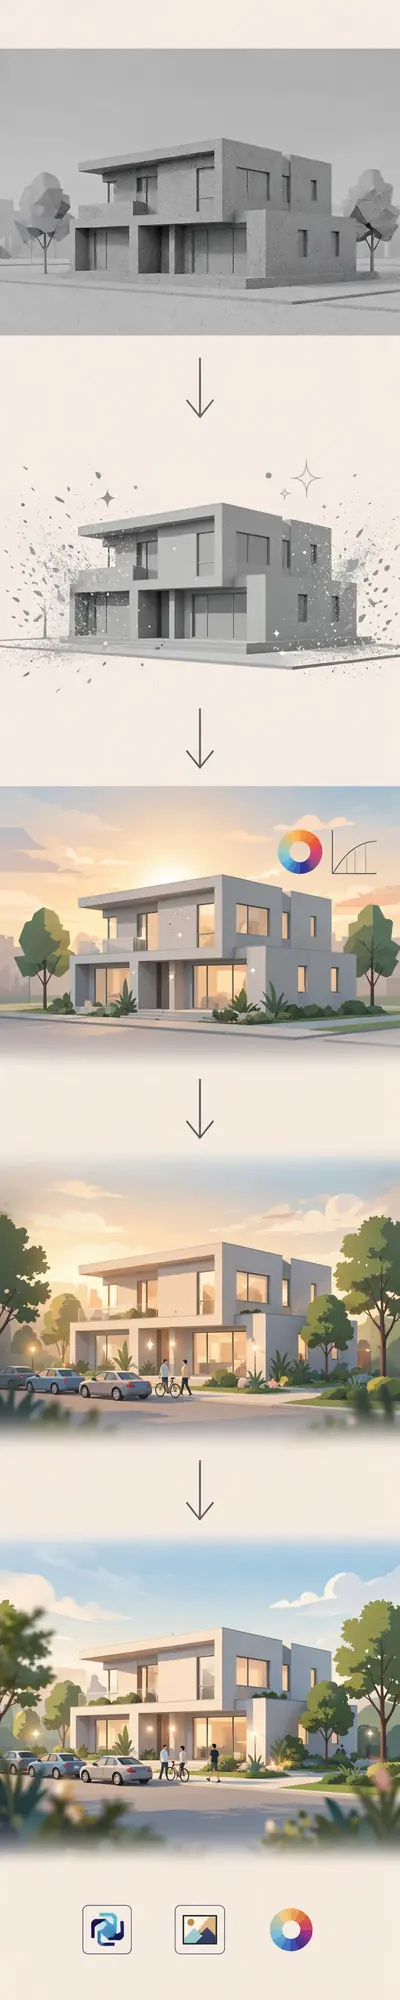
Adobe Photoshop
Photoshop is the industry standard for post-processing exterior renderings. Studios use it for:
- Sky replacement and color grading
- Adding realistic lens effects (subtle vignetting, bloom)
- Compositing people, vehicles, or additional landscaping elements
- Correcting minor geometry or material issues that would be costly to fix by re-rendering
Adobe Lightroom
Some studios use Lightroom for batch color correction across multiple renderings from the same project, ensuring visual consistency across an entire marketing set.
DaVinci Resolve (for animated walkthroughs)
When a project includes video flythroughs rather than static images, colorists use DaVinci Resolve to grade footage exported from the rendering engine.
This final stage is where a technically correct render becomes an emotionally compelling image, and it’s often the step that separates studios producing merely accurate visuals from those producing genuinely sellable marketing assets.
What Happens During a Typical Post-Production Pass
A raw render exported directly from V-Ray or Corona is rarely the image a client actually receives. Instead, post-production artists typically work through several passes:
- Denoising and sharpening, cleaning up any residual grain from the ray-tracing calculation.
- Sky and atmosphere adjustments, often replacing a flat rendered sky with a more dynamic HDR sky photograph for added realism.
- Color balancing, ensuring the building materials read accurately under natural daylight rather than appearing washed out or overly saturated.
- Selective sharpening and depth-of-field effects, subtly guiding the viewer’s eye toward the building itself rather than the background.
- Compositing supplementary elements, such as parked vehicles, pedestrians, or additional landscaping that would have been too time-consuming to model and render natively in 3D.
Studios that skip this stage, or rush through it, often produce renderings that are technically correct but emotionally flat. This is one of the less visible reasons why two studios using the exact same rendering engine can still produce noticeably different final results.
Comparison Table: Popular Rendering Engines at a Glance
| Rendering Engine | Type | Best For | Typical Render Time | Learning Curve |
|---|---|---|---|---|
| V-Ray | Ray-traced (CPU/GPU) | High-end photorealistic stills | Minutes to hours | Moderate to steep |
| Corona Renderer | Ray-traced (CPU) | Natural lighting, marketing renders | Minutes to hours | Moderate |
| Lumion | Real-time | Fast previews, landscaping-heavy scenes | Seconds to minutes | Easy |
| Enscape | Real-time | Design-phase walkthroughs | Instant | Easy |
| Twinmotion | Real-time (Unreal Engine) | Large developments, animations | Seconds to minutes | Easy to moderate |
Quick Reference: Software by Pipeline Stage
| Pipeline Stage | Common Software |
|---|---|
| Modeling | SketchUp, Revit, 3ds Max, Rhino |
| Rendering | V-Ray, Corona, Lumion, Enscape, Twinmotion |
| Texturing | Substance 3D Painter, Quixel Megascans, Chaos Cosmos |
| Vegetation/Context | Forest Pack, Laubwerk, HDRI libraries |
| Post-Production | Photoshop, Lightroom, DaVinci Resolve |
Hardware Considerations Behind the Software
Software alone doesn’t produce fast, high-quality renders; the underlying hardware matters just as much. Ray-tracing engines like V-Ray and Corona are computationally intensive and benefit from:
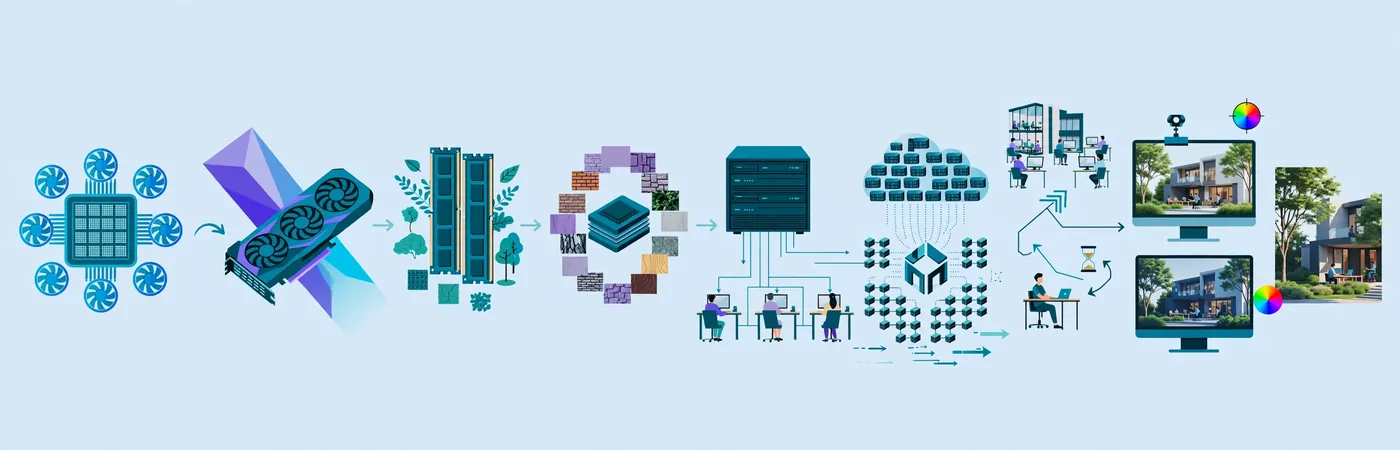
- High core-count CPUs for CPU-based rendering, or
- Powerful GPUs (typically NVIDIA RTX series) for GPU-accelerated rendering
- Large RAM capacity (64GB or more) for scenes with dense vegetation and high-resolution textures
- Fast SSD storage for handling large texture libraries and project files
Studios that invest in render farms or cloud rendering services can distribute a single frame across dozens of machines, cutting render times from hours to minutes. This is one reason established studios can offer faster turnaround than freelancers working on a single workstation.
Beyond raw specs, studios also consider network storage architecture when working on large residential developments with dozens of house models sharing a single site file. Centralized, high-speed storage (NAS or dedicated render server storage) prevents bottlenecks when multiple artists access the same scene files simultaneously. Similarly, calibrated monitors are a frequently overlooked hardware investment, since color accuracy during post-production is only meaningful if the display showing the image reproduces color faithfully. A studio might have a technically flawless render pipeline, but if the monitor used for color grading is inaccurate, the final delivered image can look different than intended once viewed on the client’s own screen.
Common Mistakes When Choosing or Using Rendering Software
Even with the right applications, poor workflow decisions can undermine render quality. Here are mistakes that frequently show up in amateur or rushed projects.

- Using outdated texture resolutions. Low-resolution materials look fine from a distance but fall apart under close inspection, which matters for marketing renderings meant to be viewed at full size.
- Skipping HDRI lighting setups. Relying only on default artificial lights instead of environment-based lighting produces flat, unrealistic shadows.
- Overusing real-time engines for final marketing assets. Real-time renderers are excellent for previews but often lack the fine reflection and refraction accuracy that ray-traced engines provide for hero shots.
- Ignoring scale accuracy in vegetation and site context. Trees, cars, and people that are improperly scaled instantly break the illusion of realism, even when the building itself looks perfect.
- Neglecting post-production entirely. A raw render straight out of V-Ray or Corona almost always benefits from color grading and minor compositing adjustments.
- Mixing incompatible file formats between modeling and rendering software. This causes texture mapping errors, missing geometry, or broken material assignments during handoff.
Expert Tips for Getting Studio-Quality Results
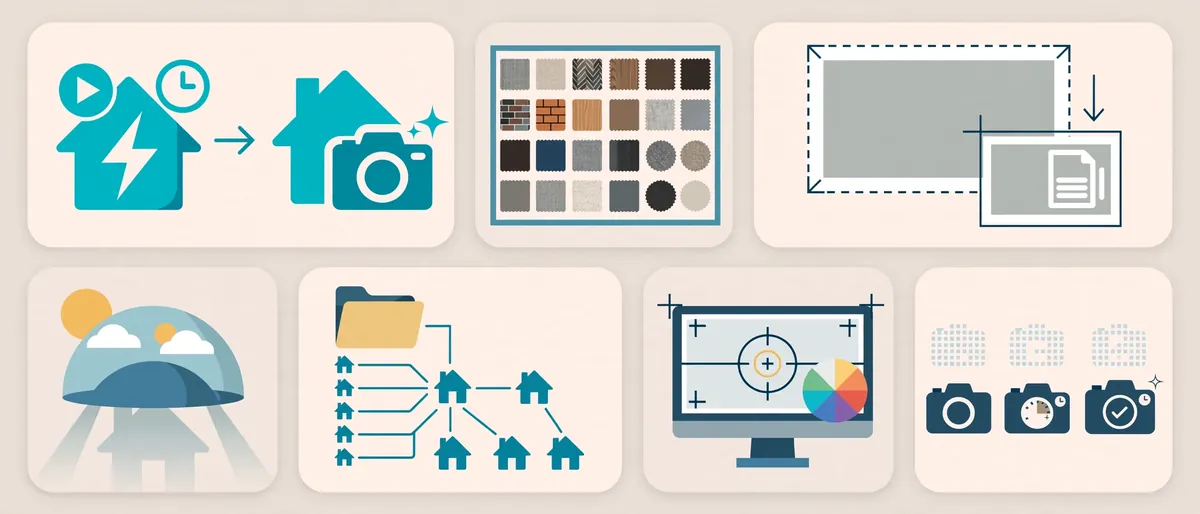
- Match the rendering engine to the deliverable. Use real-time tools like Lumion for client walkthroughs and design reviews, but switch to V-Ray or Corona for final marketing stills.
- Build a personal or studio material library. Reusing tested, calibrated materials across projects saves significant time and ensures consistency.
- Always render at higher resolution than the final output requires. This gives post-production more flexibility for cropping, zooming, or print use.
- Use physically based HDRI lighting whenever possible, since it produces the most naturalistic light and shadow behavior with minimal manual adjustment.
- Keep a version-controlled project file structure, especially on larger residential developments where multiple house models share a single site file.
- Calibrate your monitor before final color grading, since even a technically perfect render can look inconsistent across devices if the display used for post-production isn’t color-accurate.
- Batch-test camera angles at low resolution first, then commit full ray-traced render time only to the compositions that pass client approval, saving hours of unnecessary rendering.
Step-by-Step: How a Rendering Project Moves Through the Software Stack
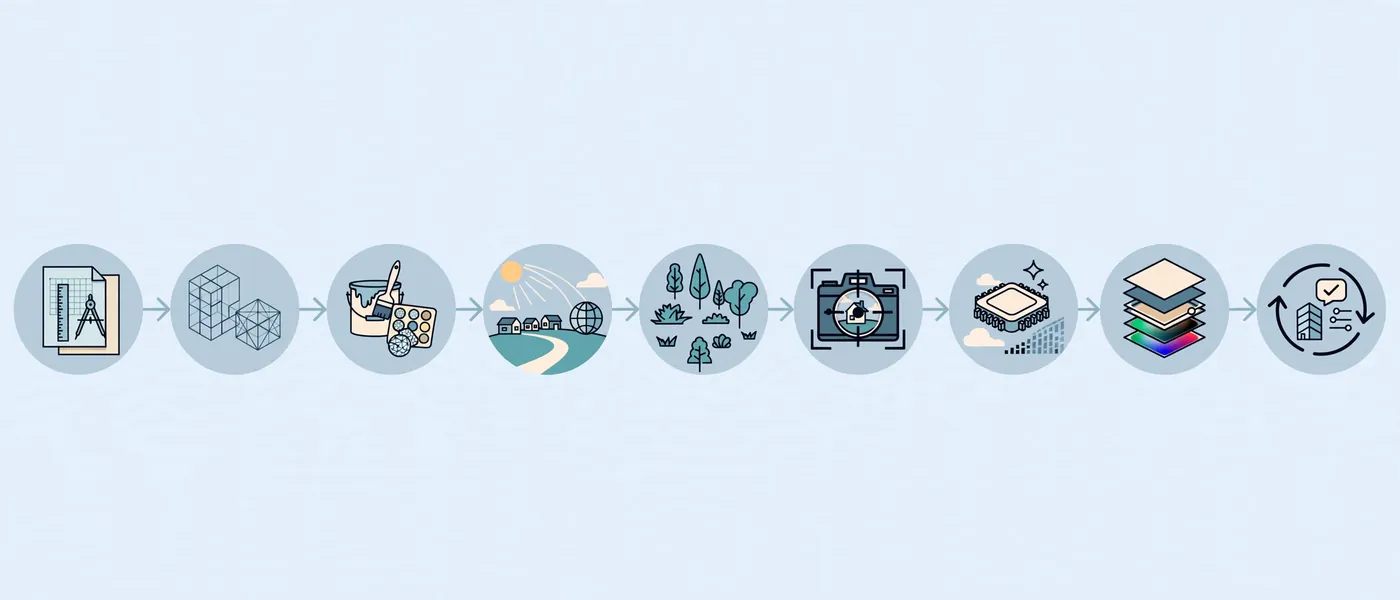
- Receive architectural drawings or CAD files from the client, architect, or builder.
- Build the 3D model in SketchUp, Revit, or 3ds Max, matching exact dimensions and structural details.
- Apply and calibrate materials using Substance 3D Painter or a pre-built material library, ensuring correct scale and reflectivity.
- Set up the scene environment, including sun position, HDRI lighting, and site context (driveways, landscaping, neighboring structures).
- Populate vegetation and site elements using scattering plugins like Forest Pack for natural, non-repetitive placement.
- Configure the camera and composition, matching the angle a homeowner or buyer would realistically view the property from.
- Render the scene using V-Ray, Corona, or a real-time engine, depending on the project’s quality and timeline requirements.
- Post-process the image in Photoshop for color grading, sky replacement, and final compositing.
- Deliver revisions based on client feedback, adjusting materials, lighting, or composition as needed.
Emerging Tools: AI and Real-Time Rendering

The rendering industry is shifting quickly, and studios that stay current with new tools tend to deliver faster and more cost-effective results.
- AI-assisted denoising (built into V-Ray and Corona) dramatically reduces the number of samples needed to produce a clean image, cutting render times significantly.
- Real-time engines built on game technology (Unreal Engine, powering Twinmotion) continue to close the visual gap with traditional ray-tracing, especially for animated walkthroughs.
- Generative AI tools are increasingly used for early concept exploration and mood-boarding, though they remain unsuitable for final, dimensionally accurate architectural deliverables.
Studios that combine traditional ray-traced rendering with these emerging real-time and AI-assisted tools are generally able to offer both premium photorealistic stills and faster, more affordable preview options within the same project.
Cloud-based rendering platforms are also reshaping how smaller studios compete with larger ones. Instead of investing in expensive in-house render farms, a growing number of visualization businesses now rent GPU or CPU compute time on demand, scaling capacity up during busy seasons and back down when project volume slows. This shift lowers the barrier to entry for high-quality exterior rendering, though it also means the software stack alone no longer fully explains quality differences between studios; workflow discipline and artistic judgment remain just as important as the tools themselves.
Frequently Asked Questions
What software do most professional studios use for 3D exterior house rendering?
Most professional studios use a combination of modeling software (SketchUp, Revit, or 3ds Max) and a rendering engine such as V-Ray, Corona, or Lumion, along with Photoshop for post-production.
Is Lumion good enough for final marketing renderings?
Lumion works well for fast previews and walkthroughs, but many studios still prefer ray-traced engines like V-Ray or Corona for final, high-resolution marketing stills due to their superior reflection and lighting accuracy.
What is the best rendering engine for photorealistic exterior renderings?
V-Ray and Corona Renderer are widely regarded as the top choices for photorealistic exterior renderings because of their physically accurate lighting and material simulation capabilities.
Do I need expensive hardware to use this rendering software?
High-end rendering engines benefit significantly from powerful CPUs or GPUs and ample RAM, though cloud rendering services allow studios and individuals to offload heavy computation without owning expensive hardware.
How long does it take to render a single exterior house image?
Render times vary from seconds (real-time engines like Lumion) to several hours (ray-traced engines like V-Ray on complex scenes), depending on resolution, scene complexity, and hardware.
Can I use free rendering software for professional exterior renderings?
Free tools can work for learning or simple projects, but professional studios typically invest in licensed software like V-Ray, Corona, or 3ds Max because of their advanced material controls, plugin ecosystems, and consistent output quality.
Conclusion
The software used for 3D exterior house rendering is never just one application, it’s a coordinated pipeline of modeling tools, rendering engines, material libraries, and post-production software, each contributing to the final image’s realism. Understanding this stack helps homeowners, architects, and builders make more informed decisions when evaluating a rendering partner, since the technology behind the scenes directly shapes turnaround time, image quality, and overall cost.
If you’re planning a project and want renderings built on this exact professional pipeline, from precise 3ds Max modeling to V-Ray-powered lighting and Photoshop finishing, get a free quote from our 3D exterior rendering studio today and see how the right software stack translates into imagery that sells.