
Texture mapping exterior rendering is the process of projecting high-resolution material data, diffuse color, normal maps, roughness, and displacement, onto a 3D mesh so that brick, stone, and wood read as physically accurate surfaces rather than flat digital skins. It relies on UV unwrapping, PBR (Physically Based Rendering) shaders, and calibrated lighting to reproduce how real materials scatter, absorb, and bounce light. Without this layered workflow, even a geometrically perfect house model looks synthetic the moment a client zooms into the facade.
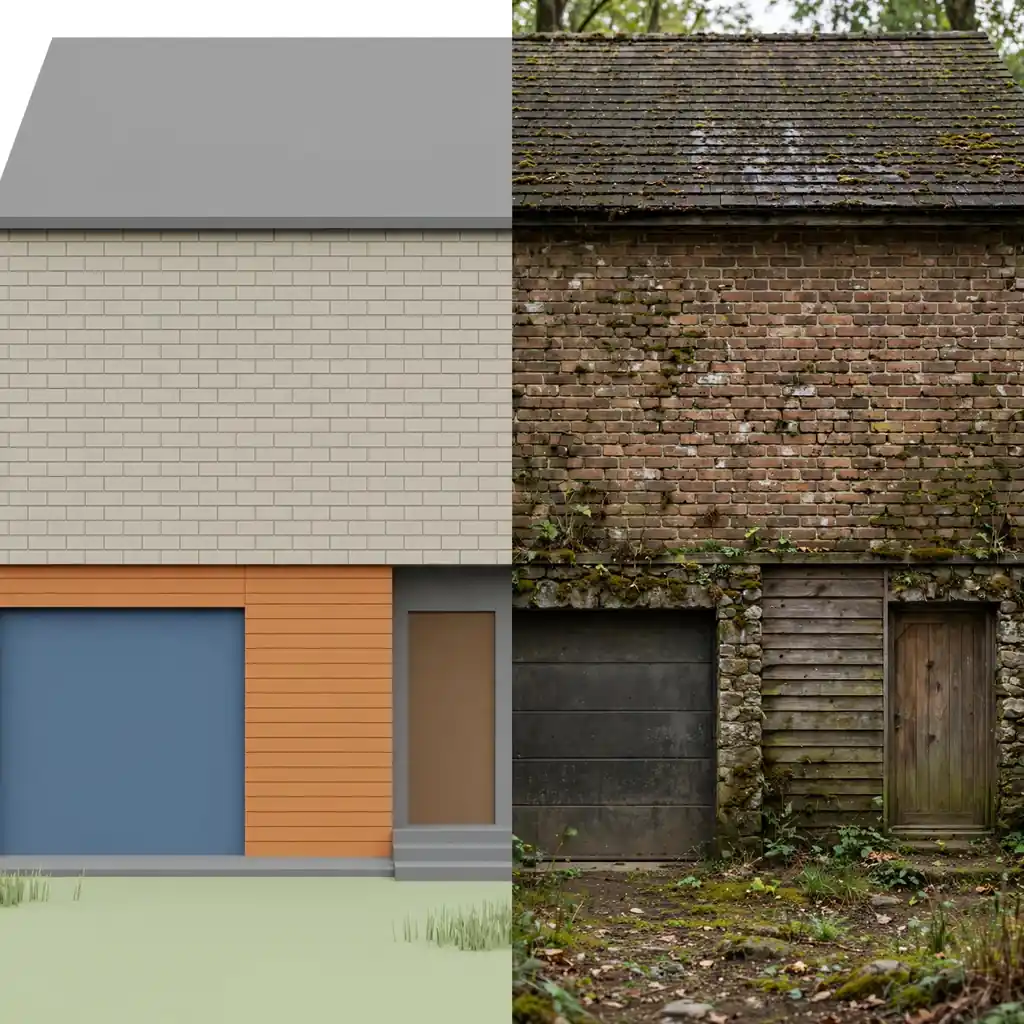
If you’ve ever looked at a rendering and instantly known it was “CGI,” the culprit is almost always the texture, not the geometry. A homeowner scrolling through renderings before construction, or a real estate agent posting exterior visuals to attract buyers, notices surface realism before anything else. That’s why 3D Exterior House Rendering Services treat texture mapping as a core technical discipline, not a cosmetic afterthought, and it’s the single biggest lever for pushing a render from “obviously fake” to “indistinguishable from a photograph.”
In this guide, we’ll break down exactly how texture mapping exterior rendering works for brick, stone, and wood surfaces: the software pipeline, the physics behind realistic materials, the mistakes that give away a render, and the expert techniques studios use to get facades that hold up under close inspection.
What is Texture Mapping in Exterior Rendering?
Texture mapping is the technique of wrapping a 2D image (a texture) around a 3D object’s surface using coordinate data called UV maps. In architectural visualization, this means taking a photograph or a procedurally generated pattern of brick, stone, or wood and applying it to the corresponding wall, cladding, or trim in the 3D model.
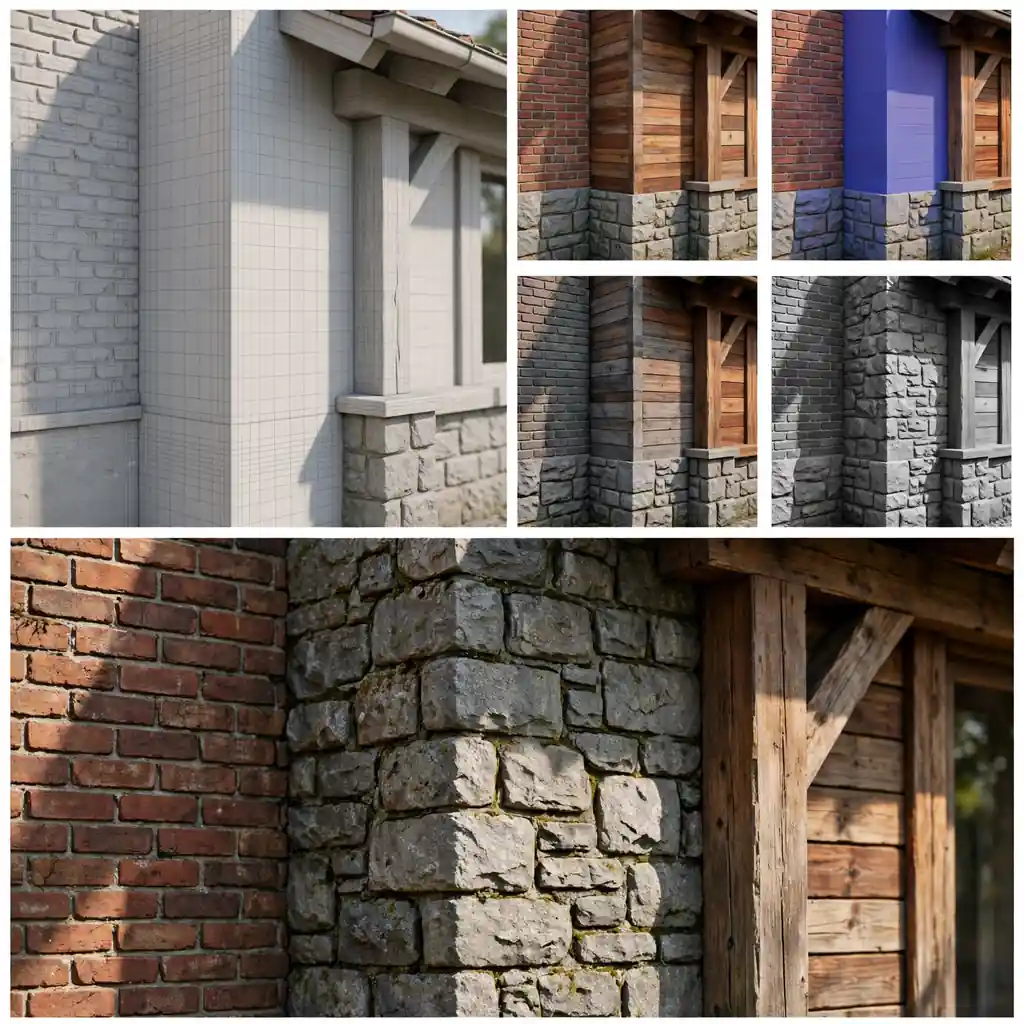
At its simplest, texture mapping answers one question: how does light interact with this surface at every single point? A brick wall isn’t one flat red color; it’s thousands of individual units with mortar joints, chips, efflorescence, and subtle color variation. Texture mapping exterior rendering reproduces that complexity through several data layers working together rather than a single flat image. the core texture map types
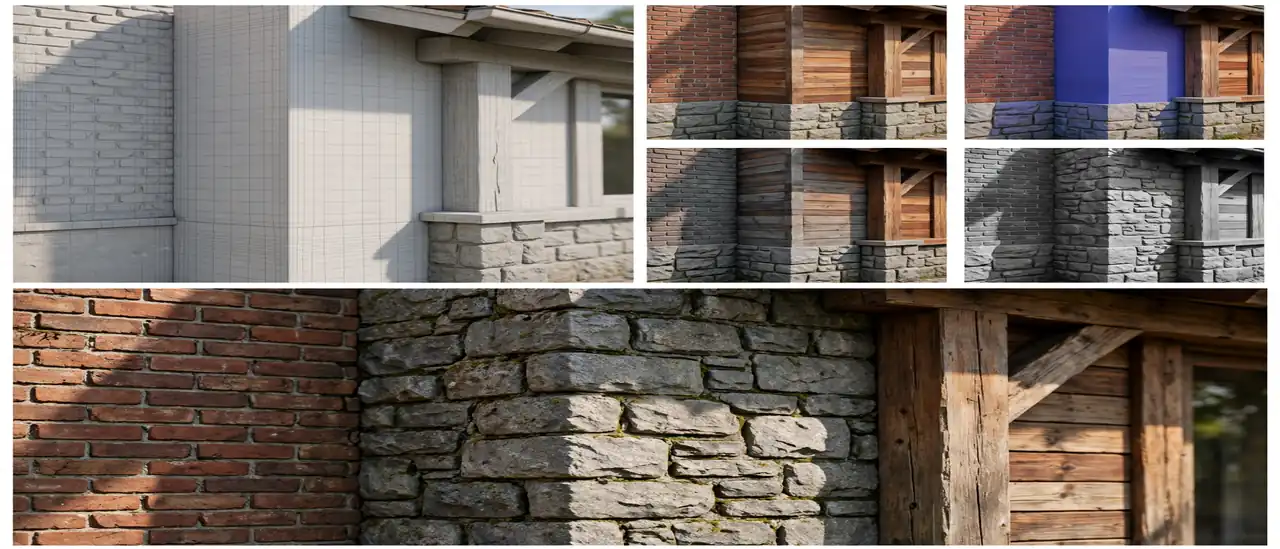
Modern rendering pipelines use a stack of maps, not just one:
- Diffuse/Albedo Map: The base color information, what the material looks like under neutral, shadow-free light.
- Normal Map: Simulates small surface bumps (mortar lines, grain, chipped edges) without adding real geometry, so light bends around them correctly.
- Roughness Map: Controls how sharp or diffused reflections appear, weathered wood scatters light differently than polished stone.
- Displacement/Height Map: Physically pushes geometry to create real depth for deep grooves, like recessed brick joints or rough-cut stone edges.
- Ambient Occlusion (AO) Map: Darkens crevices and tight corners where light naturally struggles to reach, adding believable depth.
- Specular/Reflection Map: Defines where and how intensely a surface reflects light, critical for wet stone or varnished wood trim.
Each of these maps is combined inside a PBR shader, which calculates how light behaves according to real-world physics rather than arbitrary artistic settings. This is why most professional pipelines today are built around PBR workflows, standardized by real-time engines and adopted widely across the visualization industry, as documented in Autodesk’s material and rendering resources.
Why Texture Mapping Makes or Breaks Photorealism
A house rendering can have flawless proportions, accurate window placements, and a beautifully composed camera angle, and still look artificial if the brick pattern repeats too obviously or the wood grain looks painted on. This ties directly into what actually makes a render believable, something we cover in depth in our technical breakdown of photorealistic exterior rendering.
Three factors determine whether a textured surface reads as real:
- Scale accuracy – Bricks, stones, or wood planks must match real-world dimensions on the model; oversized or undersized texture tiling instantly breaks immersion.
- Variation – Real materials never repeat perfectly. Subtle randomness in color, damage, and pattern prevents the “wallpaper effect.”
- Physical response to light – Matte brick, glossy varnished wood, and rough natural stone must each reflect and absorb light differently under the same sun angle.
When these three elements align, viewers stop analyzing the image and simply believe it. That trust matters enormously for how architects use 3D exterior rendering to present designs to clients; a client approving a facade material needs to see, convincingly, how it will actually look once built.
How Brick Textures Are Made to Look Real
Brick is deceptively difficult. It looks simple, but it’s one of the most texture-map-intensive materials in exterior rendering because of its repetitive unit structure.
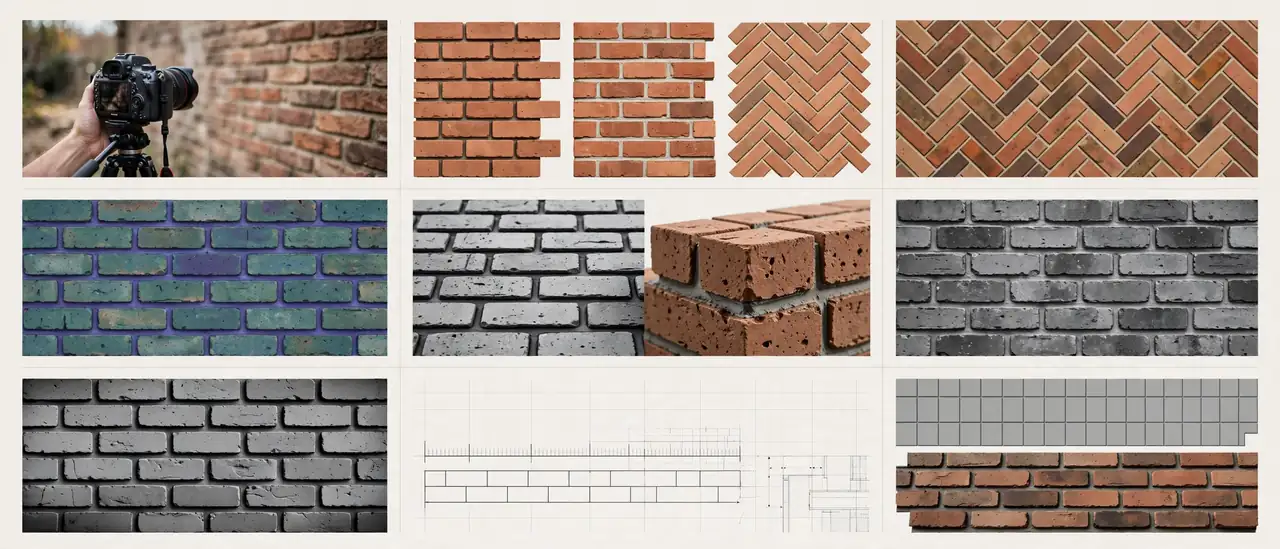
Step-by-Step: Brick Texture Workflow
- Source high-resolution reference photography of the specific brick type and bond pattern (running bond, Flemish bond, herringbone) requested by the client.
- Clean and tile the base diffuse map so the pattern repeats seamlessly without visible seams, while preserving natural color drift across the surface.
- Generate a normal map from the photographed brick to capture the recessed mortar joints and slight surface pitting on each unit.
- Add a displacement pass for close-up camera angles, so mortar joints have real physical depth rather than a painted illusion.
- Apply a roughness map that varies subtly, weathered brick faces are rougher and less reflective than fresh-cut units.
- Layer in an AO map to deepen shadows naturally along mortar lines and corners.
- Adjust tiling scale to match architectural drawings, ensuring the brick unit size lines up with the building’s actual dimensions.
Common Brick Texture Mistakes
- Using a single tileable image without breaking up the repetition, resulting in an obvious grid pattern across large walls.
- Ignoring mortar joint depth, which makes brick look like a printed decal rather than a masonry surface.
- Applying uniform, flat lighting response across the whole facade instead of letting roughness vary by weathering and shadow exposure.
- Skipping corner and edge detailing, where brick returns around window openings often look flat or misaligned.
How Stone Textures Are Made to Look Real
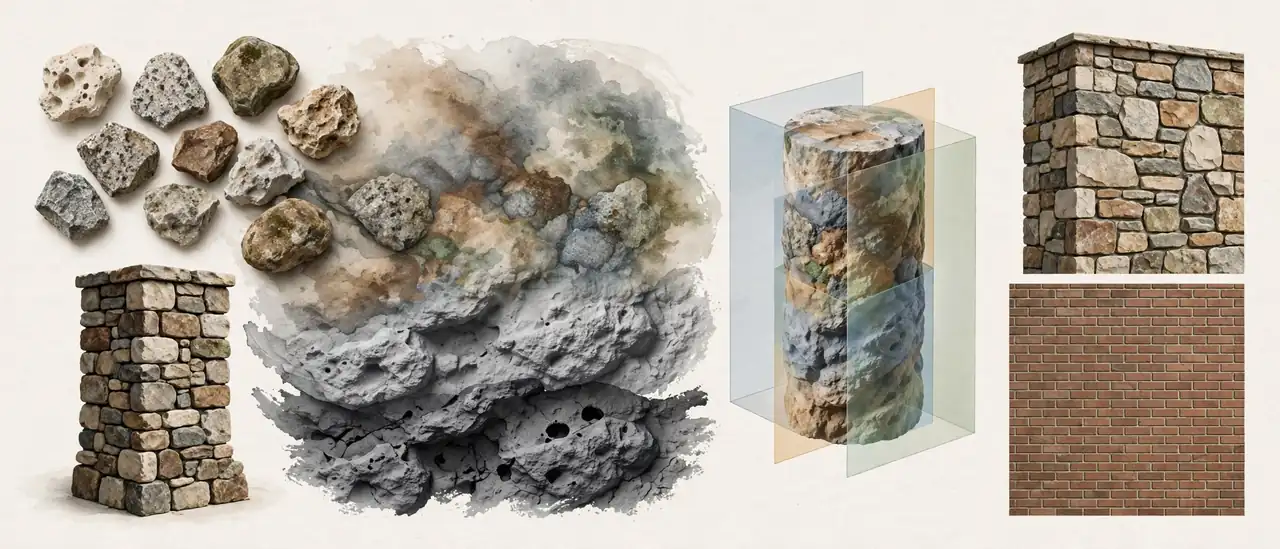
Natural stone, whether limestone, granite veneer, or fieldstone, presents a different challenge: irregularity. Unlike brick’s predictable units, stone facades rely on organic, non-repeating patterns.
Techniques for Photorealistic Stone
- High-variance diffuse maps built from multiple photographed stone samples blended together, so no two sections of wall look identical.
- Aggressive displacement mapping, since stone’s surface irregularity is often the single biggest visual cue separating real from rendered.
- Micro-shadow detailing via AO maps, because stone’s uneven surface creates constant small shadows that flat renders often miss entirely.
- Color temperature shifts across a single wall to mimic mineral variation, natural stone rarely holds one consistent hue.
Stone also benefits enormously from triplanar mapping, a technique that projects texture from three axes simultaneously to avoid the stretching artifacts that appear on curved or irregular stone surfaces, particularly around chimneys, columns, and accent walls. This is especially relevant when homeowners use 3D exterior renderings before construction to compare stone veneer options against brick or siding, since subtle material realism directly affects their final decision.
How Wood Textures Are Made to Look Real
Wood cladding, whether cedar shakes, board-and-batten siding, or timber accents, depends heavily on grain direction and finish type.
What Separates Realistic Wood From Flat Wood
| Element | Flat/Unrealistic Wood | Photorealistic Wood |
|---|---|---|
| Grain direction | Ignored or randomly rotated | Follows the actual plank orientation and installation direction |
| Surface finish | Uniform matte or glossy | Varies by weathering, stain absorption, and UV exposure |
| Board seams | Missing or perfectly even | Slightly irregular with visible fastener shadows |
| Color consistency | Identical across all boards | Natural variation between boards from the same batch |
| Reflectivity | Static across the surface | Roughness map varies with grain and finish wear |
Wood grain must also respect the physical installation logic. Horizontal lap siding, vertical board-and-batten, and diagonal accent paneling all scatter light differently depending on grain alignment relative to the sun’s angle, something a skilled texture artist adjusts per elevation rather than applying a single wood map globally across the model.
The Physics Behind Believable Materials
Texture mapping only works because it’s tethered to actual light physics, not artistic guesswork. When sunlight hits a brick wall, some of that light bounces straight back (specular reflection), some scatters in many directions (diffuse reflection), and some gets absorbed and converted to heat. The ratio between these three behaviors is what your eye reads as “brick” versus “polished stone” versus “raw wood,” long before you consciously register the color or pattern.
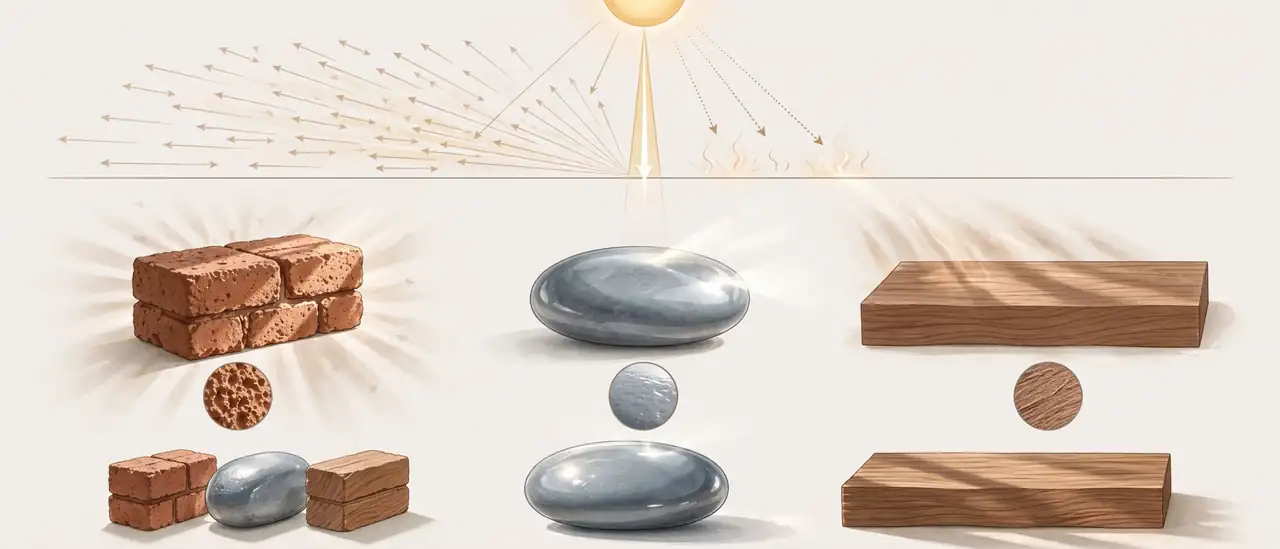
PBR shaders model this ratio mathematically using the roughness and metallic values baked into a material’s texture maps. A rough, porous brick scatters light broadly, producing a soft, matte look with almost no highlight. A wet or sealed stone surface, by contrast, produces a tighter, brighter highlight because more light bounces directly back toward the viewer. Getting this balance wrong is why some renders look like they’re made of plastic or wax rather than a real building material.
This is also where energy conservation comes into play, a core PBR principle that stops a surface from reflecting more light than it received in the first place. Older, non-PBR rendering engines often skipped this check, which is part of why renders from a decade ago tend to look “hot” or artificially glossy compared to modern PBR-based output.
Why Sun Angle Changes Everything
A texture that looks perfect at noon can look completely wrong at golden hour. Grazing light at low sun angles exaggerates every bump in a normal or displacement map, brick mortar joints suddenly cast long shadows, wood grain becomes much more visible, and stone’s irregular surface reveals far more depth than it shows under flat midday light. Because of this, professional studios test every material under at least two or three lighting setups before locking a final render, not just the “hero” angle the client requested.
How Camera Distance Changes Texture Requirements
A wide establishing shot of a house and a tight close-up of a stone entryway demand very different texture resolutions and detail levels. This is one of the most overlooked aspects of texture mapping exterior rendering, and it’s a major reason budgets and turnaround times vary between project types.
- Wide/hero shots: Lower-resolution diffuse and normal maps are often sufficient, since fine surface detail isn’t visible at that distance, and rendering resources are better spent on lighting, atmosphere, and landscaping detail.
- Mid-range shots: This is where most exterior renders live, requiring a full PBR map stack (diffuse, normal, roughness) tuned to real-world scale so brick coursing and wood board widths read correctly.
- Close-up/marketing shots: Displacement mapping becomes essential here, since flat normal maps start to reveal their limitations under scrutiny; actual geometric depth is needed to sell the illusion at this range.
Studios that don’t plan for this distinction often reuse one texture resolution across every shot type, which either wastes render time on wide shots or produces disappointing results when a client requests a tighter crop for marketing material later.
Texture Mapping Across Different Architectural Styles
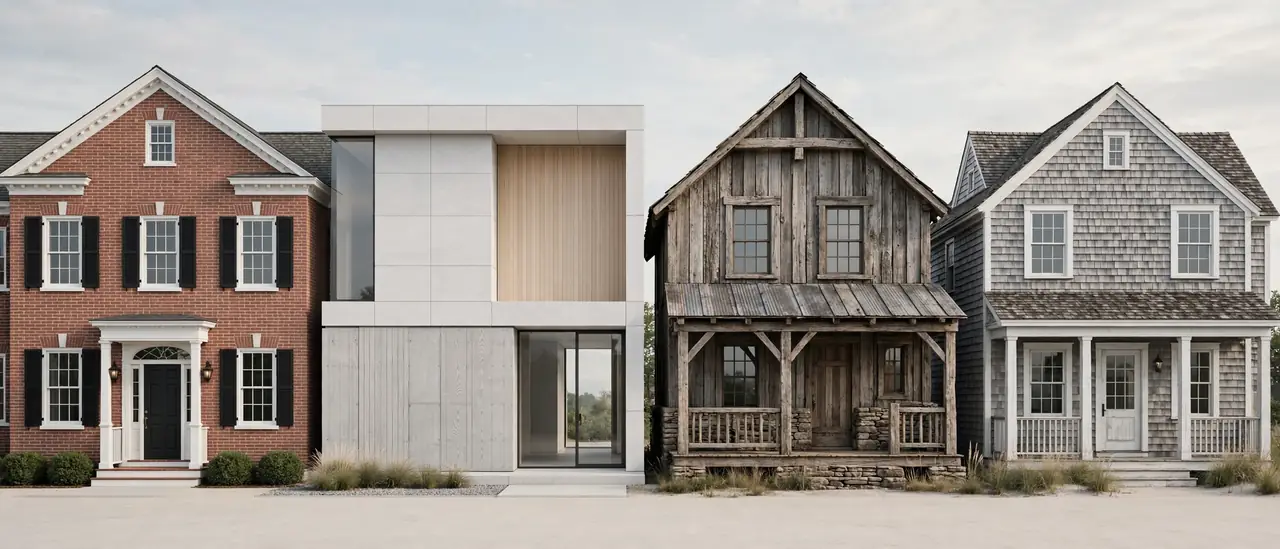
Material realism expectations shift depending on the architectural style being rendered, and texture artists adjust their approach accordingly.
- Traditional/Colonial homes: Brick and painted wood trim dominate, with an emphasis on crisp, well-maintained mortar lines and minimal weathering unless the brief calls for a historic look.
- Modern/Contemporary homes: Large-format stone panels, board-formed concrete, and minimalist wood cladding require near-seamless tiling since these designs typically feature large, uninterrupted surface areas where any repetition is instantly obvious.
- Rustic/Farmhouse homes: Reclaimed wood, fieldstone, and exposed timber benefit from heavier weathering, more aggressive displacement, and intentional irregularity to sell the handmade aesthetic.
- Coastal homes: Cedar shake siding and painted wood trim need to account for salt-air weathering patterns and UV fading that differ from inland wood textures.
Recognizing these stylistic differences matters enormously for how architects use 3D exterior rendering to present designs to clients, since a client reviewing a farmhouse concept expects a different surface character than one reviewing a sleek modern build, even if both use similar wood species.
Procedural Textures vs. Photo-Based Textures
Studios generally choose between two texture-sourcing approaches, and most professional pipelines blend both depending on the situation.
Photo-based textures start with real photography of the actual material, offering the highest fidelity to a specific product a client has selected, such as a named brick color or a specific stone quarry’s veneer. The tradeoff is that photo-based textures require careful tiling work to avoid visible seams and repetition.
Procedural textures are generated algorithmically using noise functions and mathematical patterns rather than photographs. They tile infinitely without seams and can be adjusted non-destructively (changing color, scale, or wear with a slider rather than repainting an image), but they can look slightly generic unless heavily customized to match a real reference.
Most experienced studios use a hybrid approach: photo-based diffuse maps for accuracy, layered with procedural roughness and displacement variation to break up repetition and add natural randomness that a single photograph can’t provide across a large surface area.
Comparison: Texture Mapping Complexity by Material
| Material | Primary Challenge | Key Map Priority | Typical Render Time Impact |
|---|---|---|---|
| Brick | Repetition and mortar depth | Normal + Displacement | Moderate |
| Stone | Irregularity and color variance | Displacement + AO | High |
| Wood | Grain direction and finish variation | Roughness + Normal | Low to Moderate |
This table is useful as a quick reference for clients comparing material options during the design phase, and it pairs well with an at-a-glance infographic (see suggested visuals below).
Software and Tools Behind Texture Mapping

Professional studios typically combine several tools across the texture mapping pipeline:
- 3ds Max, SketchUp, or Revit for the base geometry and UV layout.
- Substance 3D Painter or Designer for building and painting PBR material maps with procedural control.
- V-Ray, Corona, or Lumion as the rendering engine that interprets the PBR data under realistic lighting.
- Photogrammetry-based scan libraries for sourcing accurate real-world material references rather than relying on generic stock textures.
According to material standards published by Khronos Group’s glTF PBR specification, consistent metallic-roughness workflows are now considered the industry baseline for physically accurate rendering across platforms, which is part of why cross-software material consistency has become easier to maintain over the last several years.
Quality Control: How Studios Verify Texture Accuracy Before Delivery
Texture mapping isn’t finished the moment materials are applied to a model. Reputable studios run a structured QA pass before any render reaches a client, and this step is often what separates a polished delivery from one that needs revision rounds.
- Material swatch comparison: Rendered material patches are compared side-by-side against manufacturer swatches or physical samples to confirm color accuracy under neutral lighting.
- Scale verification against elevation drawings: Brick coursing, stone unit sizes, and wood board widths are checked against architectural drawings to confirm they match specified dimensions, not just “look about right.”
- Multi-angle render tests: The same wall section is tested under at least two lighting conditions to catch reflectivity or roughness errors that only appear at certain sun angles.
- Zoom-in stress tests: Reviewers zoom into the highest-resolution planned output to check for stretching, tiling seams, or flattened detail that wouldn’t be visible in a thumbnail preview but would be obvious in a final large-format image.
- Cross-material consistency checks: When multiple materials meet (brick transitioning to stone at a water table, or wood trim against a stucco wall), reviewers confirm the transition looks physically plausible rather than like two flat layers pasted together.
This QA discipline matters most when the render is being used for something high-stakes, like the visuals featured in how to choose a 3D exterior house rendering company, where material fidelity directly affects a buyer’s confidence in the finished product before a single brick is laid.
Common Mistakes That Break Realism in Texture Mapping
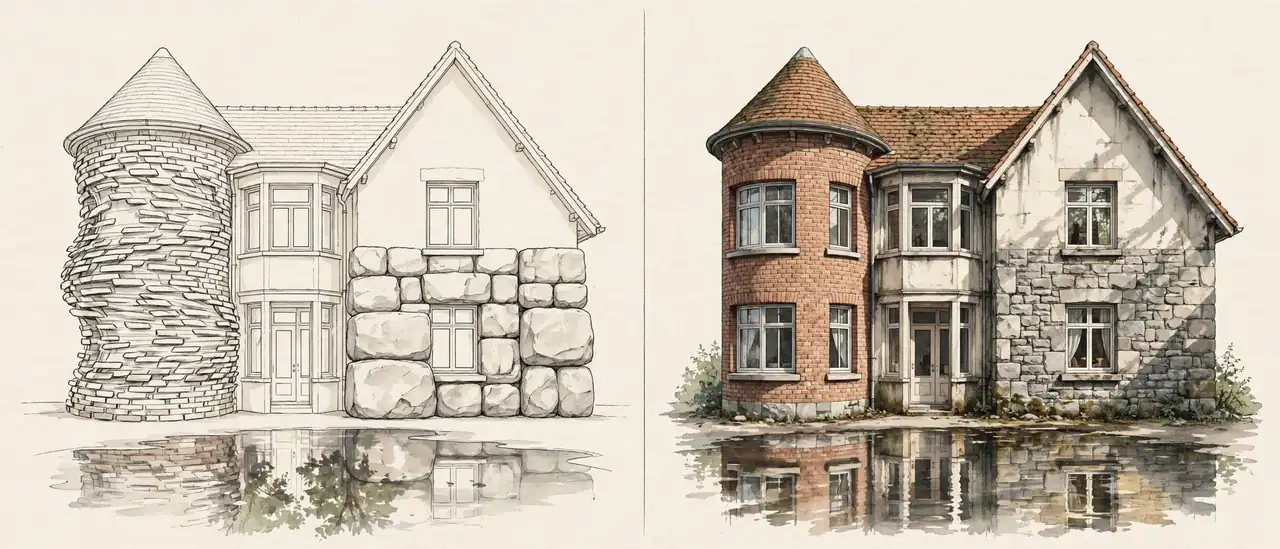
Even experienced teams fall into predictable traps. Watch for these:
- Texture stretching on curved or angled surfaces, common on bay windows, turrets, or angled gables where UV unwrapping wasn’t adjusted per surface.
- Mismatched scale between materials, brick that’s proportionally correct next to stone that’s oversized breaks the illusion instantly.
- Overly clean textures with no weathering, real exteriors show dirt streaks, subtle fading, and moisture staining, especially near rooflines and ground contact.
- Flat lighting response, applying the same roughness value to an entire facade regardless of material orientation to the sun.
- Ignoring reflection interplay, wet-look driveways or pools reflecting nearby textured walls incorrectly, which viewers subconsciously notice even without naming it.
Expert Tips for Getting Texture Mapping Right
- Always reference real material photography specific to the client’s chosen product, generic stock textures rarely match actual brick or stone color codes.
- Vary tiling manually rather than relying purely on procedural randomization, human judgment catches unnatural patterns algorithms miss.
- Render test patches first at final camera distance before applying textures across the entire model, catching scale issues early saves significant rework.
- Cross-check under multiple lighting conditions (morning, midday, dusk) since roughness and reflectivity errors often only appear under certain sun angles.
- Collaborate with architects on material specs early, since real estate agents marketing homes before they’re built depend on that material accuracy translating into buyer confidence.
Practical Insights for Clients Requesting Custom Materials
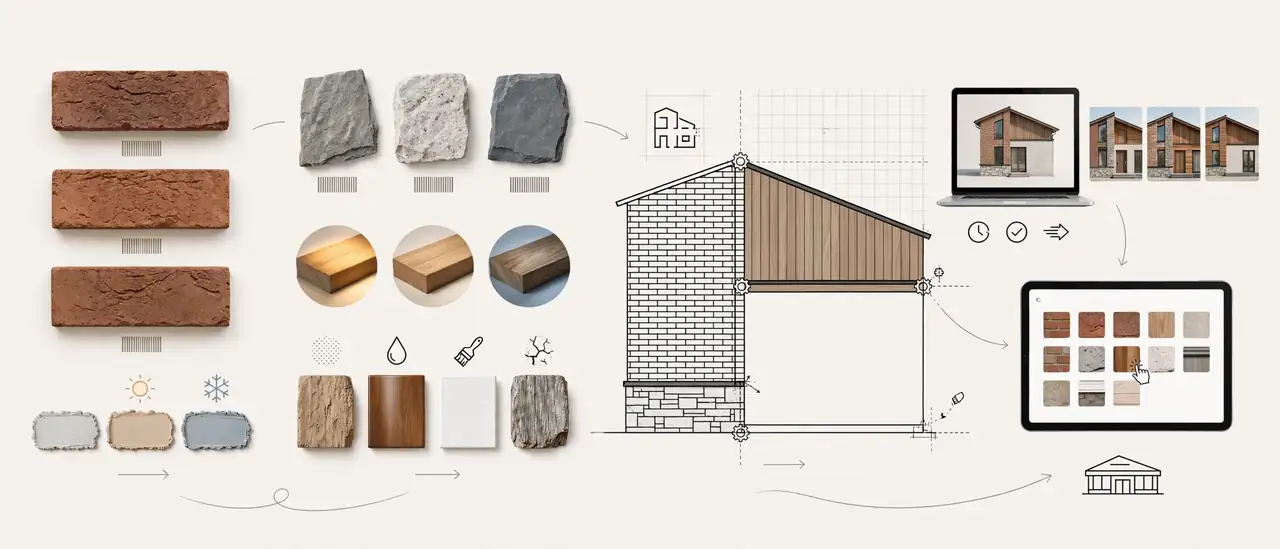
Clients often assume that specifying a brand-name brick or a specific stone quarry is enough for a studio to reproduce it perfectly, but a few practical details make an enormous difference in the final result.
- Share the actual product code or manufacturer name, not just a general description like “reddish brick,” since color codes vary significantly between manufacturers even within the same general shade family.
- Provide physical samples when possible, since photographs of stone and wood under different lighting can shift color perception more than people expect.
- Specify the mortar color separately from the brick color, since mortar tone dramatically affects how warm or cool a brick facade reads overall.
- Clarify the finish level for wood, stained, painted, sealed, or raw weathered wood all require entirely different roughness and reflectivity settings.
- Mention any accent or trim materials early, since transitions between materials (brick to stone skirting, wood to stucco) need to be planned during the UV and texture stage, not patched in afterward.
This kind of upfront material clarity shortens revision cycles considerably, and it’s especially valuable for home builders using 3D exterior rendering to drive pre-construction sales, where multiple material package options often need to be rendered accurately and quickly for a sales gallery or online configurator.
Step-by-Step: A Typical Texture Mapping Workflow for a New Project
- Receive architectural drawings and material specifications from the client or builder.
- Source or photograph reference materials matching the exact product specified.
- Build the base 3D model and complete UV unwrapping for all exterior surfaces.
- Create or adapt PBR material maps (diffuse, normal, roughness, displacement, AO) for each material type.
- Apply materials to the model, adjusting scale and orientation per surface.
- Set up lighting and render test angles to check for stretching, tiling, or reflectivity issues.
- Refine based on internal QA and client feedback before final high-resolution rendering.
This structured approach is also why home builders rely on 3D exterior rendering to drive pre-construction sales; buyers trust material representations that hold up to scrutiny, and that trust starts with a disciplined texture mapping process rather than a rushed one.
FAQs About Texture Mapping in Exterior Rendering
What is texture mapping in exterior rendering?
Texture mapping exterior rendering is the process of applying detailed material data, color, surface bumps, roughness, and depth, onto a 3D model so brick, stone, and wood look physically accurate under realistic lighting.
Why do some 3D renders look fake even with good lighting?
Good lighting alone can’t fix flat or poorly scaled textures. If the diffuse map lacks variation or the normal map doesn’t capture true surface depth, the render will look synthetic regardless of how well the lighting is set up.
What’s the difference between diffuse maps and normal maps?
A diffuse map defines base color, while a normal map simulates small surface bumps and depth without adding actual geometry, allowing light to interact realistically with grooves and textures.
Does texture mapping affect render time?
Yes. Displacement-heavy materials like natural stone typically increase render time because they add real geometric detail, while simpler roughness-based materials like painted wood render faster.
Can texture mapping be adjusted after the model is built?
In most cases, yes. Material and texture adjustments are usually less time-intensive than geometry changes, which is one reason clients can request material comparisons late in the design process.
How many texture maps does a single material typically need?
A fully photorealistic material usually relies on five layered maps working together: diffuse, normal, roughness, displacement, and ambient occlusion. Simpler materials viewed only from a distance may need fewer, while hero close-up shots often need all five plus a specular map.
Why does the same brick texture look different in two renders of the same house?
Lighting angle, camera distance, and roughness calibration all change how a single texture reads. A brick map tuned for a midday hero shot can look noticeably different under a dusk lighting setup unless the roughness and reflectivity values were tested across multiple conditions beforehand.
Is photo-based texturing always better than procedural texturing?
Not necessarily. Photo-based textures offer the highest accuracy to a specific real-world product, while procedural textures tile seamlessly and adjust non-destructively. Most professional workflows combine both rather than relying on one exclusively.
Conclusion
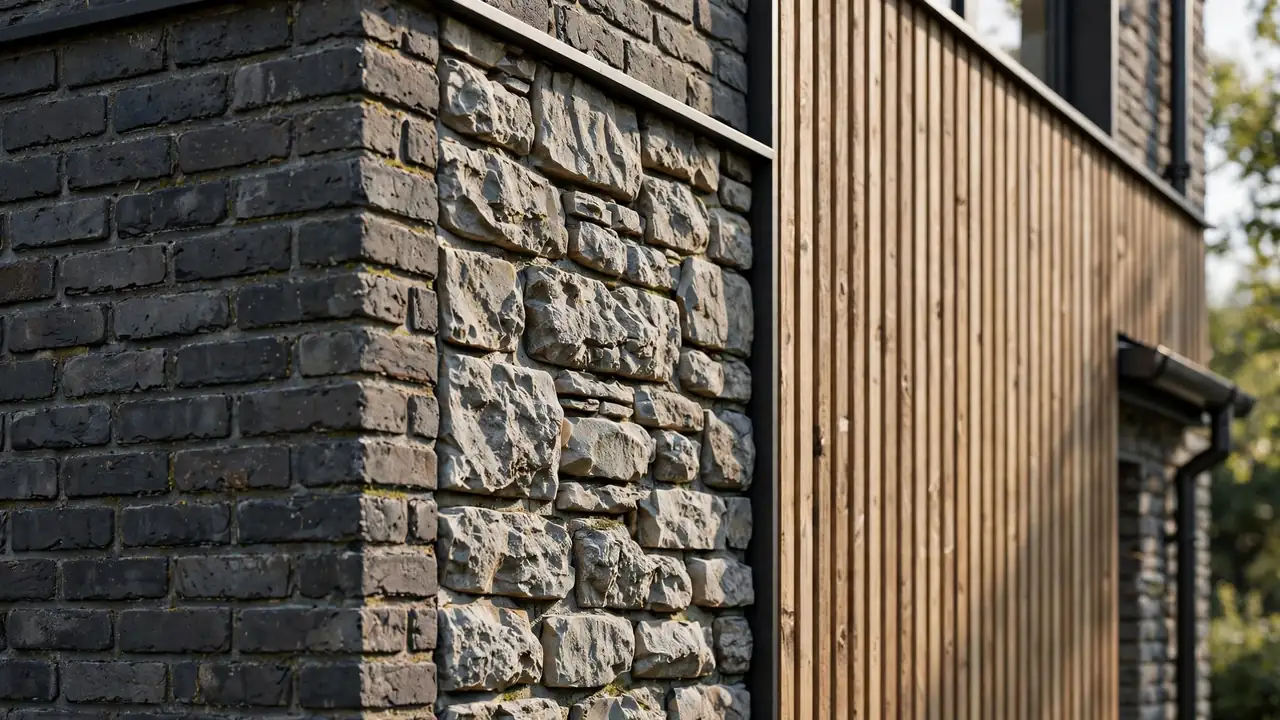
Texture mapping exterior rendering is the technical foundation that separates a convincing architectural visual from an obviously synthetic one. Brick, stone, and wood each demand a different combination of diffuse, normal, roughness, displacement, and AO maps, applied with attention to real-world scale, variation, and lighting response. Get this layer wrong, and even a perfectly modeled house falls apart under scrutiny; get it right, and clients stop seeing a render and start seeing their future home.
If you’re ready to see your project rendered with this level of material accuracy, request a 3D exterior rendering quote from our team and get facades that hold up to the closest inspection.
Pingback: Software Used for 3D Exterior House Rendering (Pro Guide)